Lemon Parmesan Brussels Sprouts

Lemon Parmesan Brussels Sprouts TRDE

Lemon Parmesan Brussels Sprouts

All you need:

  • 2 tablespoons olive oil
  • 2 pounds Brussels sprouts, trimmed and halved
  • salt and pepper, to taste
  • 1/2 of a lemon
  • 1/2 cup grated Parmesan cheese.

All you do:

  1. Over medium-high heat, place a large saute pan and add olive oil.
  2. Place trimmed and halved Brussels Sprouts in pan, cut-side down.
  3. Saute for 5-7 minutes, until bottoms are golden brown. The less you stir, the better your results.
  4. Give a quick stir/flip. Season with salt and pepper.
  5. Squeeze the juice of half a fresh lemon over the top of the Brussels Sprouts, stir.
  6. Once steam has stopped (30 – 60 seconds), remove from heat and place into a serving dish. Cover with grated Parmesan cheese, serve.
Advertisement
Posted in Recipes | Tagged , , , , , , , , , , | Leave a comment

Southwest Chicken Egg Rolls

baked-egg-rolls2


Baked Southwest Chicken Egg Rolls
All you need:
1 chicken breast (can use fresh or leftovers. Pork also works well)
1 tsp taco seasoning
1 cup frozen corn, thawed
1 (15 oz.) can no salt added black beans, rinsed and drained
1 (10 oz.) package frozen chopped spinach, thawed and squeezed dry
2 cups shredded cheddar cheese
1 (4 oz.) can diced green chiles, drained
4 green onions, chopped
2 tbsp minced red bell pepper
1 tsp. ground cumin
½ tsp. chili powder
1 tsp. salt
½ tsp. pepper
1 package egg roll wrappers (flour tortillas work well for this, too)

All you do:

  1. In a medium skillet, cook chicken breast on medium high until internal temperature reaches 165˚F. Shred and season with taco seasoning.
  2. In a large bowl, combine the remaining ingredients with the exception of the egg roll wrappers. Stir in cooked chicken mixture. Mix well to blend.
  3. Lay an egg roll wrapper out on a work surface so that one of the corners is pointing toward you and place ¼ cup of the filling in the center. Fold the tip closest to you up over the filling, roll a bit, then take the points pointing outward and fold them in toward the center. Continue rolling into an egg roll shape until a small part of the remaining point is still free. Dip a finger in water lightly brush on the edges of the top corner. Finish rolling and press to seal closed. Repeat with the remaining wrappers and filling.
  4. Preheat the oven to 425˚ F. Lightly oil a baking sheet with cooking spray. Place the sealed egg rolls on the baking sheet seam side down and spray the tops of the egg rolls with cooking spray. Bake for about 15 minutes, or until lightly brown, turning halfway through baking.

*Note, I have also found that broiling for 1-2 minutes after cooking really helps to crisp up the edges. Be sure to check ever 30 seconds to avoid burning them.

** These can also be made ahead and frozen for a quick and convenient meal or snack. Before baking, place in a gallon-sized zipper bag and freeze. To eat, from frozen, either wrap in a slightly damp paper towel and microwave for 2-3 minutes (let set for 1 minute), or bake in oven as directed above.

Posted in Recipes | Tagged , , , , , , , , | Leave a comment

Food of the year: Cauliflower

2017 is off to a great start. This time of year is always exciting for me, people are genuinely interested in trying new foods and recipes. What I am most excited about this year, is the humble cauliflower!

I’m serious, I predict that cauliflower is going to be the vegetable of the year. (Insert tiara). 

There are several new cauliflower products out on the market such as cauliflower crumbles, cauliflower tater tot’s, and cauliflower blends. But my favorite way to eat cauliflower is roasted. There’s something about the roasting process that just brings out the natural sweetness and cauliflower flavor. It’s simple, flavorful, and just amazing!

All you do is cut up your cauliflower, drizzle with a little olive oil, salt, pepper or any other spices you enjoy (we love smoked paprika), roast in a hot oven (425 degrees) for about 30 minutes, flipping halfway through. Make sure to leave plenty of room on the pan so that the cauliflower roasts instead of steams. Overcrowding causes soggy vegetables. (And no one likes soggy vegetables.)


The result is something slightly magical. My family finds it highly addictive. We can easily go through two heads in one meal. 

So, as you aim to add more veggies to your day, don’t forget about the humble cauliflower.

Posted in Recipes | Tagged , , | 1 Comment

Friendsgiving

We have all heard of Thanksgiving, but Friendsgiving is the new kid in town. A traditional Thanksgiving meal, except with friends, this meal is traditionally served the weekend before or after Turkey Day. Whether you are a Friendsgiving newbie, or an old pro, here are 10 rules to make your party the best yet.

Friendsgiving

  1. The host makes the turkey.
  2. Send out old-school paper invites.
  3. Be mindful of dietary restrictions (and talk to you Hy-Vee dietitian for suggestions).
  4. The most reliable friend brings the appetizers.
  5. Potatoes and stuffing are a MUST!
  6. It’s okay if the cranberries come from a can.
  7. Desserts!!!
  8. Set a proper table.
  9. Everyone brings wine… one person brings whiskey.
  10. Choose a friend with good taste in music to DJ.

Most importantly, here is how to ROAST the BEST turkey of your life!

Posted in Recipes | Tagged , , , , , , | Leave a comment

Making Meals, Making Memories and 10 Conversation Starters

Are family meals a lost art? In our world today, with fast-paced lives, busy work schedules and extracurricular activities, drive-thru meals and takeout food have become the norm. What impact does this have on our kids, our families and ourselves? As the trend moves toward simplicity and convenience, let’s not overlook the fact that preparing and eating meals together stimulates communication, creates memories and establishes healthy eating behaviors that have a long-lasting impact.

Research shows that when families eat meals together on a regular basis, they have greater unity and closer relationships. Children in families who eat together are better adjusted to the pressures of society. These children are more comfortable and confident in their own skin. The long-term nutritional benefits for individuals who have grown up eating family meals are clear too. The percentage of family members who are overweight, or abuse alcohol or drugs, is significantly lower in families who eat meals together on a regular basis than those who don’t.

Family Eating Meal Together In Kitchen

Family Eating Meal Together In Kitchen

Historically, traditional family meals were part of an everyday ritual, like brushing teeth. Homemade meals were prepared from scratch, dinner was served at the same time every night, and family members had assigned seats. Lessons and wisdom were shared over the dinner table. Children grew in their character, learning manners, self-discipline and gratitude.

When schedules are busy, and time is at a premium, there is still hope for the family meal. September is National Family Meals Month, which means it’s the perfect time to start making family meals a normal occurrence in your home. Here are a few tips on how to do it:

  • Pick one or two days a week for everyone to commit to.
  • Pick a recipe and side dishes the family can agree on. Choose foods from all food groups, and foods that vary in color, taste and texture, to increase nutritional benefit.
  • Choose a recipe that allows for convenience. Slow-cooker meals, casseroles and grilled meats are all good ideas. Check out all Hy-Vee has to offer for fast, easy and healthy meals.
  • Plan for conversation starters. For example, have everyone go around the table and say one thing they are grateful for, or share an interesting story from their day.
  • Keep everyone in touch by turning the television off and having a “no phones at the dinner table” policy.

Here are 10 conversation starters for your next meal:

  • If you could be a cartoon character for one week, who would you be?
  • What would you do if school/work was cancelled tomorrow and you could do anything you wanted?
  • How would you describe yourself to someone who has never met you?
  • If you could live in any home on a television series, what would it be?
  • If you could be any animal, which would you be?
  • If you had to live in a different state, which would you choose?
  • If you could start a new family tradition, what would it be?
  • If snow could fall in any flavor, what flavor would you choose?
  • Would you rather be a great musician, athlete, scientist, artist, politician, or writer?
  • What is the sound you love the most? Why?


Posted in On My Mind | Tagged , , , , , , , | Leave a comment

Rutabaga Fries

Rutabaga fries are a great way to include veggies into your next meal. With half the carbohydrates as potatoes, these garden gems cook up into delicious fries. 


The process is simple. 

1. Preheat oven to 425 degrees. Peel the rutabaga and cut into thin fries (thin pieces will lead to a crisper fry).

2. Place on a foil-lines pan and coat with oil, salt and seasoning (garlic powder, rosemary, basil, Italian seasoning, etc) of your choice. 


3. Bake for 20-30 minutes flipping halfway through. 


4. Serve like you would French fries. 

Posted in Recipes | Tagged , , | 5 Comments

Stuffed Dates (Bacon Wrapped)

You know those times where delicious, simple, and nutritious meet? Well, I’ve found it!

If you haven’t ever tried Medjool dates, then you should. They are softer and sweeter than other dates and taste like candy (with one simple ingredient, DATES)!

Snacking on these little guys is always a fine idea, but sometimes a girl just has to do a little more!

Here are 4 different recipes for ways to use dates that I promise you won’t regret!

IMG_2898[1].JPG

Homemade LARAbars.
In a food processor, add 1 cup pitted Medjool dates (about 12), 1 cup cashews, 1/4 cup peanut butter and 1 tablespoon water. Puree until the mixture comes together. Press between sheets of wax paper and refrigerate for best results. (Makes 12).

Bacon-Wrapped Dates
all you need:
12 slices of bacon
24 medjool dates, pitted
4 oz goat cheese

all you do:
1. Preheat oven to 350 degrees. Cut bacon slices in half.
2. Stuff dates with goat cheese and wrap with bacon. Spread bacon-wrapped dates on a parchment paper-lined baking sheet.
3. Bake for 20 minutes, then broil for 5 minutes. Cool for 5 minutes and serve.

IMG_2911

IMG_2909

Stuffed Dates
all you need:
14 Medjool dates, pitted
1 oz goat cheese
1 oz blue cheese
2 oz cream cheese, divided
14 almonds
2 Tbsp walnut pieces

all you do:
1. In a small bowl, stir together goat cheese and 1 ounce cream cheese. In a separate bowl, stir together blue cheese and remaining 1 ounce cream cheese.

2. Using a spoon, stuff the goat cheese mixture into 7 Medjool dates, top with 2 almonds. Alternately, stuff the blue cheese mixture into the remaining 7 Medjool dates, top with walnuts.

Note, these can be prepared in advance.


Posted in Recipes | Tagged , , , , , , | Leave a comment

Kalettes

We are about to go crazy for Kalettes! No, that is not a made-up word – Kalettes are a delicious new vegetable that are a blend of Brussels sprouts and the beloved kale. They are made through the process of traditional hybridization and are one of the hottest trends in vegetables right now.

  
Kalettes are functional, simple to prepare and look fantastic. You can expect to overload your taste buds with a nutritious vegetable that tastes sweet and nutty all at the same time. Kalettes are also great because they will appeal to everyone, whether you are a vegan, vegetarian or you just want a new veggie to add to your diet! There is no waste either – the entire Kalette from the leaves to the stem can be used in cooking.

How do you know which Kalettes to pick? Their brilliant purple stems and green leaves will indicate a healthy plant. Avoid leaves that have started yellowing or turned brown. You will find Kalettes in the refrigerated produce section, typically near the other bagged salads. Store Kalettes in the refrigerator until they are ready to be enjoyed.

  
Not only are Kalettes a tasty addition to the everyday diet – they are nutritious, too. They are low-calorie, low-sodium, fat-free and contain a little bit of protein. One serving (one and a half cups) provides 40 percent of your daily vitamin C needs, 120 percent of your vitamin K needs, and 10 percent of your daily vitamin B6 needs.  

There are several different ways to try this new veggie. You can:

  • Sauté. Place Kalettes in a covered pan for about 5 to 7 minutes and cook until tender.
  • Roast. Coat Kalettes with olive oil and place on a baking sheet; bake at 475 degrees for about 10 minutes.
  • Grill. Put Kalettes in tin foil or a basket and grill for about 10 minutes (or until charred) on medium heat.
  • Eat raw. Talk about spicing up your salad! Chop up and add to romaine lettuce or eat Kalettes themselves covered in your choice of salad dressing.
  • Add to recipes for new flavor. Add Kalettes to any recipe where you would add other veggies (i.e.: onions or bell peppers).
Posted in Recipes | Tagged , , , , , | Leave a comment

Roasted Garbanzo Beans

You say chickpeas, I say garbanzo beans… We’re both right! 

I love a good salty, crunchy snack. Can anyone say potato chip? And I have found a new favorite. Garbanzo beans, when roasted, are crispy, crunchy, and hearty. 

This homemade version takes about 5 minutes of hands-on time. You’ll want to save your energy for all the snacking you will be doing later. 

  This recipe is so simple and uses ingredients that I always have on hand. 

  1. Canned garbanzo beans (aka chickpeas)
  2. Oil
  3. Salt
  4. Seasoning

  
A word to the wise, go ahead and make a double batch (using 2 separate pans), but don’t eat a double batch in one sitting. These are still beans, and they may “talk back”. (Not that I know from experience or anything…)


Roasted Garbanzo Beans

All you need:
1 (15 oz can) garbanzo beans (aka chickpeas)
1 tsp olive oil
Salt, to taste
Seasonings (I like garlic powder and smoked paprika).

All you do:

  1. Preheat oven to 375 degrees F. Rinse and drain the beans. Pour on a towel and thoroughly pat dry. 
  2. Spread the beans onto a parchment-lined baking pan (foil can work in a pinch). Drizzle the beans with oil and thoroughly coat. Spread around the pan evenly, taking care not to over-crowd. 
  3. Bake the beans for 20 minutes. Take out of the oven and let cool for 5-10 minutes. Stir and place back into the oven for an additional 20-25 minutes, or until golden brown and crispy. 
  4. Remove from the oven and immediately sprinkle with salt, to taste, and seasonings. Best when allows to cool at room temperature. 
Posted in Recipes | Tagged , , , , , , , | Leave a comment

Savor the Flavor of Eating Right

NNM2016Graphic
High protein, low carbohydrate, gluten-free, probiotics, whole grain, green tea, shakes…

Everywhere you look, someone has the newest or best way to eat. All of this information gets confusing and overwhelming. Eating becomes stressful rather than pleasurable.

Food is meant to fuel our bodies. Food is meant to be a pleasant and joyful experience. All too often we rob ourselves of this experience. Rushing through a meal in order to get to the next practice or event, eating in the car, or while on the computer also take our focus away from food.

Food is a part of many aspects of our lives. Food is a vital part of many traditions and social experiences. Cake on birthdays, ham on Easter, grilled hamburgers and brats for the 4th of July, and pumpkin pie on Thanksgiving are all examples of food traditions. Food also is a very social experience. Food seems to taste better when surrounded by people. Take time to have conversations, to smell and to taste your food.

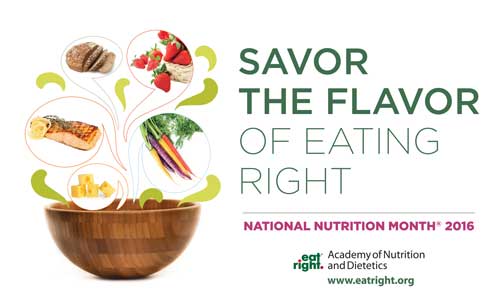
I challenge you to “Savor the flavor” of your next meal. Take a moment to enjoy the tradition of food, the social experience, and the great flavors.

How, when, why and where we eat are just as important as what we eat. Develop a mindful eating pattern that includes nutritious and flavorful foods – that's the best way to savor the flavor of eating right!

Cheesecake stuffed strawberries

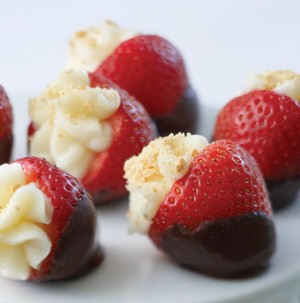
Cheesecake-Stuffed Strawberries

(source www.hy-vee.com)
Serves 15 (1 each)

All you need:
15 medium fresh strawberries
1 (8 oz) pkg cream cheese, softened
1 tsp vanilla extract
½ c graham cracker crumbs
1 (6 oz) bar dark chocolate

All you do:
1.Slice off the stem end of each strawberry. Use a knife to scoop out a little bit of each berry to make a hole in the center. Set aside.
2.Beat together cream cheese and vanilla with electric mixer until smooth.
3.Using a small spoon, fill each strawberry with the cream cheese mixture, mounding a bit on the top of the strawberry.
4.Place strawberries on cookie sheet lined with wax paper. Once all strawberries are filled, sprinkle cream cheese mixture with graham cracker crumbs.
5.In double boiler, melt chocolate chips until smooth. Gently dip the bottom of strawberries in chocolate mixture. Set on waxed paper to cool. Refrigerate berries until ready to serve. Best if served within six hours of making.

Posted in On My Mind | Tagged , , , , , , , , | Leave a comment